HockeyStack Academy 102 - Step 1 - Complete the technical implementation
This is the first part of the implementation guide, where you will learn how to complete the technical implementation.
1. Choose one person from your organization to sign up for an account and invite team members.
2. If you’d like to use SSO, notify the HockeyStack team immediately to do the necessary configuration.
a. Otherwise, if you’d like to enable MFA, you can do so for your own account in Settings > Account Settings, and you can enforce MFA for all users in Settings > Team Sharing.
3. Navigate to the integration page.
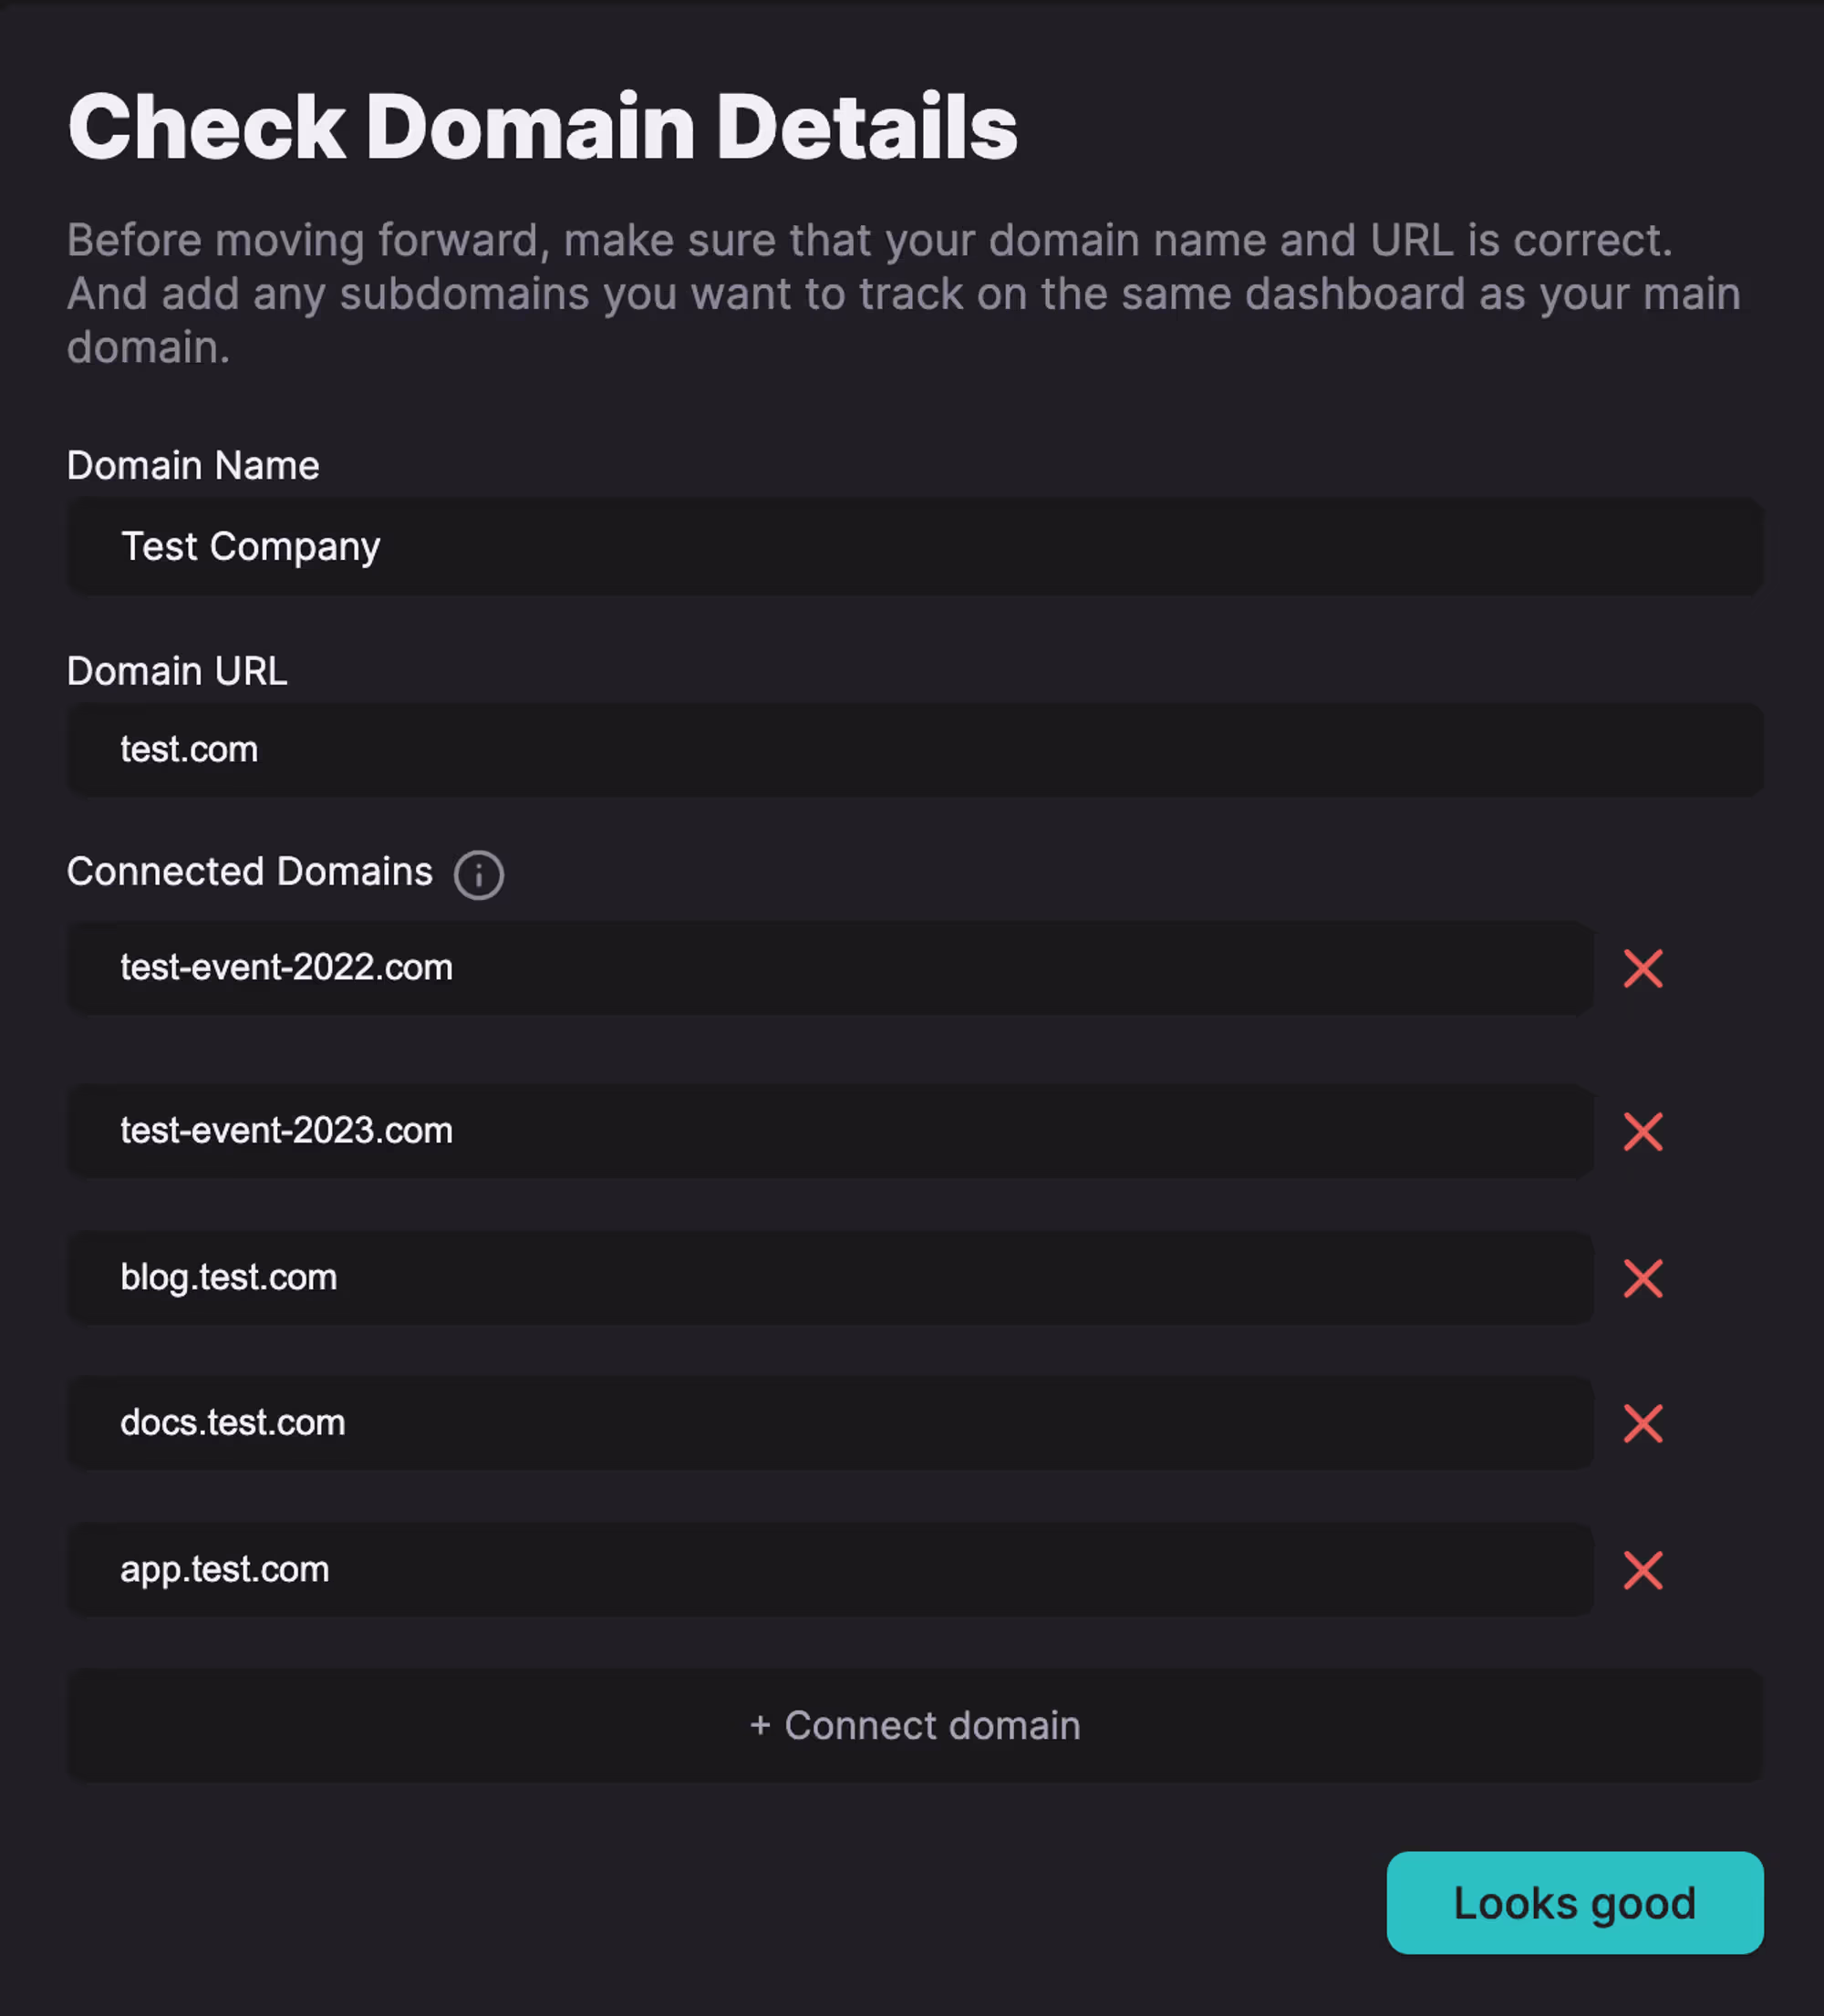
4. Make sure you enter your domain details correctly.
a. Domain Name will be the name of the workspace this account is associated with.
b. Domain URL will be the primary domain associated with this workspace.
c. Connected domains are secondary domains associated with this workspace. You can associate as many domains as you want with the same workspace, including both subdomains and other completely different domains. Website data from each domain will be tracked and reported on the same dashboard. HockeyStack will only track data from the domains you add here.
Some companies also choose to create a separate workspace for their domains, which will completely isolate all data and all setup between the two domains. This is usually not the best option, so consult with the HockeyStack team before going for this option.
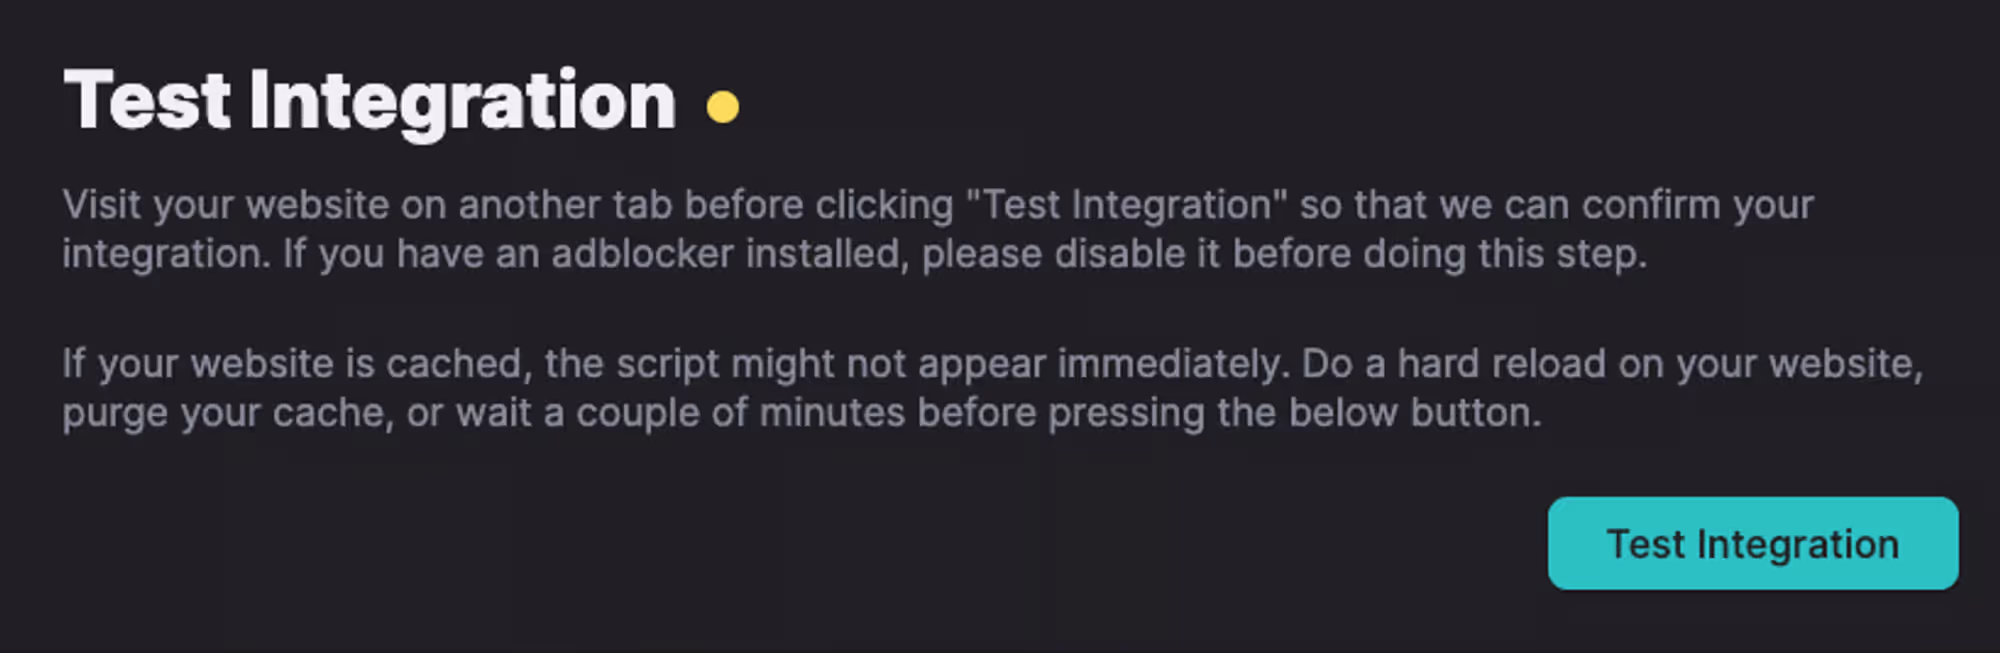
5. Add the tracking script to each of your domains from the previous step. Make sure to test that the script works on each domain.
Testing the website tracking script
6. (If you have a self-serve motion) Add the script inside your application and on your signup and login pages. Use the user identification guide to identify application users inside HockeyStack.
if (typeof HockeyStack === 'undefined') {
  if (!Array.isArray(window.hockeystackQueue)) window.hockeystackQueue = [];
  window.hockeystackQueue.push(function () {
    HockeyStack.identify(email);
  });
} else HockeyStack.identify(email);
// make sure to replace "email" with the actual email of each logged-in user. So the script should read like HockeyStack.identify('michael@dundermifflin.com') for the specific visitor.
7. Click Test Integration in the next step so that HockeyStack validates your script integration.
8. Navigate to Settings > API & Integrations, and click the Connect button next to all your desired data sources.
a. For. Ads integrations, make sure to choose all your ad accounts after authenticating with the ad platform
b. For HubSpot, we recommend starting a historical website data pull.
c. We can also pull historical website data from Marketo. Notify your HockeyStack CSM if you want this enabled.
Hubspot historical website data
9. Add your ARR field in the Settings > Report & Tracking
10. Configure your Main Currency in Settings > Report & Tracking
Odin automatically answers mission critical questions for marketing teams, builds reports from text, and sends weekly emails with insights.
You can ask Odin to find out the top performing campaigns for enterprise pipeline, which content type you should create more next quarter, or to prepare your doc for your next board meeting.
Nova does account scoring using buyer journeys, helps automate account research, and builds workflows to automate tasks.
For example, you can ask Nova to find high intent website visitors that recently hired a new CMO, do research to find if they have a specific technology on their website, and add them to the right sequence.
Our customers are already managing over $20B in campaign spend through the HockeyStack platform. This funding will allow us to expand our product offerings, and continue to help B2B companies scale revenue with AI-based insight products that make revenue optimization even easier.
We are super excited to bring more products to market this year, while helping B2B marketing and sales teams continue driving efficient growth.
A big thank you to all of our team, investors, customers, and friends. Without your support, we couldn’t have grown this fast.
Reach out if you want to learn more about our new products and check out HockeyStack!
About HockeyStack
HockeyStack is the Revenue Acceleration Platform for B2B. HockeyStack integrates with a company’s CRM, marketing automation tools, ad platforms and data warehouse to reveal the ideal customer journey and provide actionable next steps for marketing and sales teams. HockeyStack customers use this data to measure channel performance, launch cost-efficient campaigns, and prioritize the right accounts.
About Bessemer Venture Partners
Bessemer Venture Partners helps entrepreneurs lay strong foundations to build and forge long-standing companies. With more than 145 IPOs and 300 portfolio companies in the enterprise, consumer and healthcare spaces, Bessemer supports founders and CEOs from their early days through every stage of growth. Bessemer’s global portfolio has included Pinterest, Shopify, Twilio, Yelp, LinkedIn, PagerDuty, DocuSign, Wix, Fiverr, and Toast and has more than $18 billion of assets under management. Bessemer has teams of investors and partners located in Tel Aviv, Silicon Valley, San Francisco, New York, London, Hong Kong, Boston, and Bangalore. Born from innovations in steel more than a century ago, Bessemer’s storied history has afforded its partners the opportunity to celebrate and scrutinize its best investment decisions (see Memos) and also learn from its mistakes (see Anti-Portfolio).

